
Welcome to Day #1 of the First Sale Sprint Challenge!
First things first, if you haven’t started with Shopify, you’ll want to by clicking here.
This week we’re building a profitable Shopify store from the ground up!
Only it’s not our store. We are building this store for one of our students.
Today we cover the first steps you’ll need to take in order to be successful with Shopify and drop shipping.
Follow along as Rito simplifies the setup process right before your eyes:
In all of the videos and posts that we’ve done so far, the greatest challenge people are consistently facing, especially when it comes to newbies, is generating that first sale.
This was the underlying motivation for the First Sale Sprint.
For one lucky student, and live in front of you guys (and girls) we’ll be building the following from scratch:
- Launching The Store
- Designing The Layout & Logo
- Researching & Adding All The Products
- Running The Ads & Revealing The Intricacies Of The Ad Account
And everything will be done live, right here on Flying Start Online and Our YouTube Channel.
Everything will happen over the course of 7 days.
And by the 7th day, this new store should have seen its first sale.
If you already have a store but have been struggling to make your first sale, this challenge will highlight the mistakes you been making so you can go back and make corrections.
If you’ve sitting on the sidelines, waiting for the “right” time to begin, the time is now and this is the perfect challenge for you to follow along with.
Meet Nigel John

Nigel is the lucky DOer Club member and owner of the Shopify store we’ll be building during this sprint.
We have absolutely no prior connection with Nigel other than the fact he’s a DOer club member.
Step 1 – Sign Up With Shopify
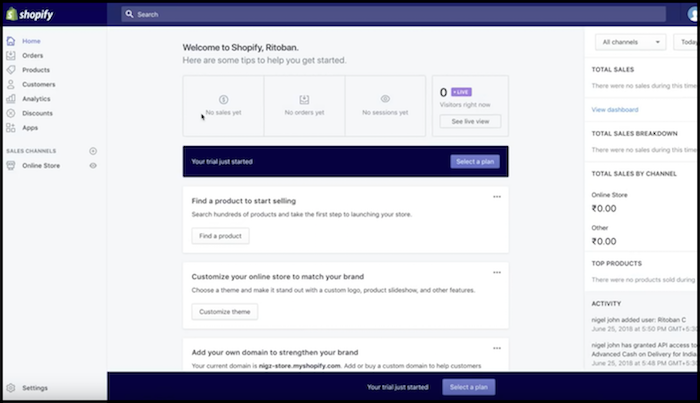
The very first thing we’ll need to do, is get Nigel signed up with Shopify.
Step 2 – Choose Your Store Name
We suggest using either NameCheap or GoDaddy as your domain registrar. They are two of the most trusted online.
It’s worth noting that Shopify will actually register domains as well, but we still recommend the aforementioned registrars instead.
Here are a couple of additional ways to pick a proper store name that sticks with people:
- Keep the name at a 4th grade level – must be speakable
- 3-4 Syllables if you can help it.
- Make sure it’s memorable
- 1-2 words is usually ideal
When choosing your domain name, also choose a .com – don’t get fancy. People automatically associate websites with .com before anything else. While your first couple domain names may be taken, trust me when I say there are plenty to choose from.
A couple other ways to generate a create business domain name is to use the following:
- Different types of animals
- Trigger words (hype, instant, legend)
- Adjectives (happy, good, nature, color, etc)
- Common Words or Phrases (hella, phat, kicks etc)
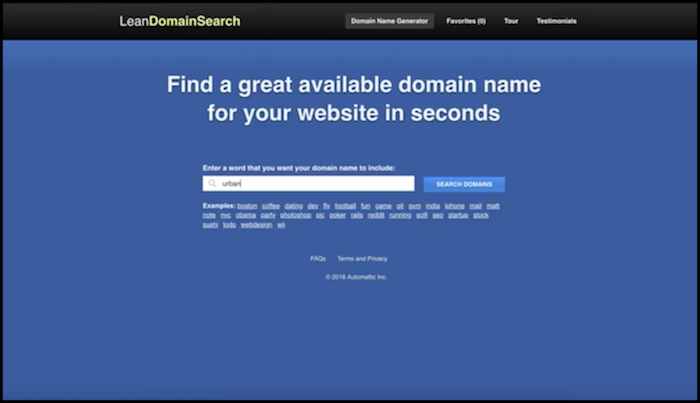
If you find yourself striking out on a good name or if you’re just struggling a creative block, head to LeanDomainSearch and enter your primary keyword or phrase where prompted.
We’ll be using the word “Urban” as the primary word for Nigel’s store name.
Now look halfway down the page on the right hand side, click “View Full List.” It will show you the 10,000 most popular topics online surrounding your keyword via domain count. This should definitely offer inspiration.
Get creative and combine words to find the perfect, catchy domain name.
Note: Don’t use words like “Deal” or “Store” when choosing a name.
Once your domain name is registered, immediately create a gmail account with the same name.
Step 3 – Connect Your Domain To Shopify
The last main step today, is linking your new domain to Shopify.
From within Shopify, click “Domains” which will immediately forward you to another page where you’ll select “Connect Existing Domain.”
Now enter your domain name – for Nigel it’s UrbanSigma.com
Once your domain is located, a button that reads “View Instructions” will appear – click it.
Now following the instructions accordingly.
Shopify makes life simple. Just follow the remaining steps provided by Shopify. They’ll be unique to each user.
Finally, we’ll setup email forwarding (with our registrar NameCheap).
- From within NameCheap, click the “Domain” tab at the top of the page.
- Scroll to “Redirect Email” click it.
- Now select “Add Forwarder”
Input any alias you’d like. In our case, we’ll use “support@urbansigma.com”
Now forward to the new gmail address you just created.
Send a test email to your alias email to ensure proper forwarding.
Step 4 – Pay Attention To Specific Shopify Settings
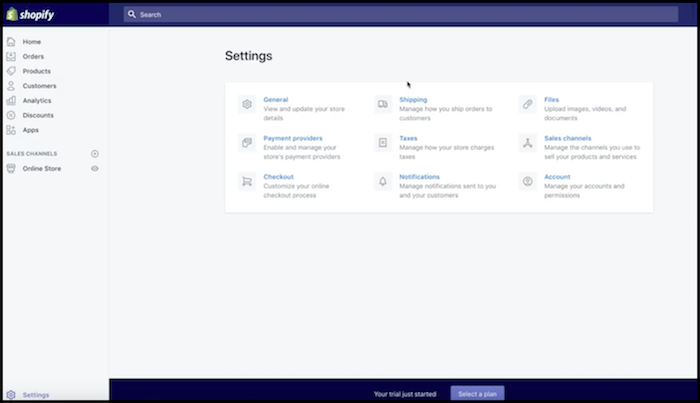
Login to your Shopify dashboard and click “settings” in the lower left-hand corner.
You should now see the following:
- General
- Payments
- Checkout
- Shipping
- Taxes
- Notifications
- Files
- Sales Channels
- Account
These are the settings to pay special attention to:
Account – This is where you’ll handle your billing once your Shopify trial is over. You’ll need to make sure there’s an up to date payment method once the trial ends so your site doesn’t experience down time.
Notifications – Shows all of the emails & notifications Shopify sends to customers on your behalf. These are pre-made so you don’t need to edit them unless you want to, in which case, simple click “customize” which is found next to each.
Checkout – This one is very important. Make sure “Customer Accounts Are Disabled” is checked. Now next to “Customer Contacts” select “Customers Can Check Out Using Email.”
Now do the following – continue scrolling to each as you go along:
- Next to ‘form options’ select “Require First & Last Name Only.”
- Under ‘Address line 2’ click “optional.”
- Under ‘Shipping Address’ phone number select “Required When The Customer Check Out.”
- Check “Use the shipping address as the billing address by default.
- Below ‘Ask for permission to send promotional emails to customers from your store,’ click “By default, customer agrees to receive promotional emails.”
- Underneath ‘After an order has been paid’, check “Do NOT Automatically fulfill any of the orders line items.”
- Below ‘After an order has been fulfilled and paid, check “Automatically archive the order.”
Now scroll down a bit further and locate ‘Refund Policy,’ ‘Privacy Policy’ and ‘Terms of Service’ and click “Generate Sample” for each.
Click “save!”
Sales Channels – From within this setting click “Add sales channel” and then choose “Facebook” since we’ll be using it to promote. From the next page, click “Connect Account” and follow the prompts and connect your Facebook (FB) page.
If you haven’t yet setup a FB page, quickly do so now:
Head over to Facebook’s Page Creator and select create “Brand or Product” and for the category choose “Website.” Select “Connect Page”
Now once again from within the Shopify ‘Sales Channels’ setting, click “Add Sales Channel” and scroll down to “Messenger” and click “Add.” Again, select your FB page from the list on the following screen.
Taxes – This one’s easy. Next to “Tax Settings” check “All taxes are included in my prices.”
Click “Save.”
Payments – After you click the ‘Payments’ link from within Shopify’s settings, and to the right of the ‘Payments’ on the next screen and underneath ‘Accept Credit Cards’, Click “Add A Provider” and make sure “Shopify Payments” is checked.
Click “Continue.”
Stripe is the Shopify default payment method.
Now click “Complete Account Setup” and confirm your personal details on the following page.
Now scroll to ‘PayPal’ and click “Express Checkout.” Now click “Activate.” Enter your PayPal email address and login. This should connect your PayPal account as well.
Shipping – Go through and simply fill out as much of the personal shipping information as you can for now. Since this business is based on drop-shipping, we’ll go more in-depth on this in a future post.
For now, just fill out what you can.
Step 5 – Use Canva To Create A Free Logo
Hiring a professional to create a snazzy looking logo usually costs between $50-$100 dollars.
We’re going to show you how to do it for free.
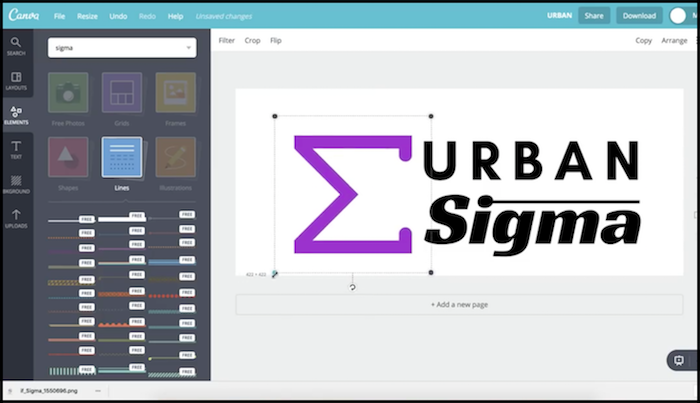
Head on over to Canva.com – they offer a free web based software you can use to create your own design.
Once you’re on the Canva homepage, click “Create a design.” Now choose “Logo” from underneath ‘Popular Design Types’ and select your template, font and any colors.
You can completely customize according to your own brand. Once you create a logo you’re happy with your logo, click “Download.”
Return to Shopify and select settings once again. Choose ‘Files’ and upload your newly created logo and edit out any excess white space with the built in editor.
Click “Save.”
Now that we’ve designed our logo, return to Canva and create your favicon.
Click “Logo” and select a piece of your new logo or a separate yet related image from the templates. Needs to be very simple and needs to relate to your store.
This new image will be very small and will appear next to the URL or your site when people visit.
You can also use it as the profile picture for your Facebook page and Instagram account.
In fact, return to Facebook, open the new Facebook page you created and click on the profile picture. Select “Upload Photo” and upload the image you just created. Click “Save.”
Step 6 – Implement The Following Pages
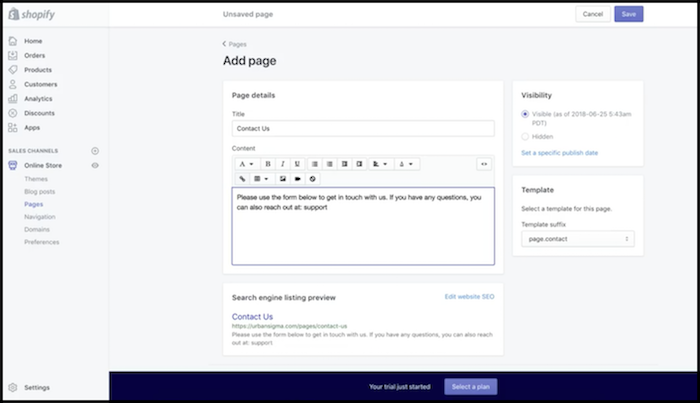
There are certain pages that search engines like Google deem a ranking factor when determining a websites quality.
When is comes to running an e-commerce business, definitely publish the following pages:
Use my examples, but don’t copy word for word. Be creative and customize each for your own business.
Here’s how to build new pages for your Shopify Store:
- Login and click “Online Store”
- Click Pages on the left sidebar -> select “Add Page”
- Now name the page accordingly and rinse and repeat.
Now that our pages are created, let’s set up our Shopify Store navigation:
- From within Shopify, click “Navigation” on the left sidebar.
- Click ‘Main Menu’ on the following page.
- Select “Add New Menu” and now add you FAQ & Contact Page by clicking “Link” -> “Pages” and locating the corresponding pages.
- Click “Add” -> “Save Menu.”
We’re keeping this menu simple for now. You’ll also want to delete the “Home” tab by clicking the trash can icon next to it.
We still need to setup our footer menu. The process is very much the same:
- From the left sidebar, once again click “Navigation” and select “Footer Menu”
- Delete the “Search” page on the following screen by clicking the trash can icon
- Now click “Add Menu Items” and name it “Shipping Policy”
- Click “Link” -> “Pages” -> “Shipping Policy”
- Save
Rinse and repeat this footer menu process for each of the policy pages we mentioned above.
Boom!
That’ll do it for Day 1 of the First Sale Sprint – Well done!
People appreciate the convenience of online shopping.
When consumers decide to purchase a product or service, they start by looking online.
Your website is where people can research products and determine if they’re a good fit or not. A well-crafted eCommerce site can influence purchases by making it easy to take action.
Questions, comments or just want to say hi? We love hearing from you below.
Success by choice, not by chance,
-David Aston
P.S.
If you’re not kept in the loop via our #Bizathon list be sure to sign up today.
P.P.S. Click here for Day 2!
Hi Rito,
Could you pass Nigel’s email id for me to get in touch with him to check how he set up a pay pal account in India. I am in the process of setting a indian company and then I should get the bank account set up.
I have heard some indian banks don’t allow paypal transactions, so wanted to check which bank did he use and did he get a credit card issues for paypal.
I am also from Kerala, so wanted to get some clarity on things
And by the way your doing an amazing stuff!! and thanks for all the knowledge your parting
Thanks
Navin
I m unable to visit the command panda page and site too it’s showing some error
Yes, its blocked in India