Each month at FSO we build a new business from Scratch in 30 days – The Bizathon Challenge!
If you haven’t yet started with Shopify, you’ll want to do so right now by clicking here.
Because this month we’re building a profitable Shopify store from the ground up.
Yesterday we revealed a 4-Step Copywriting Tactic To Sell Shopify Products With Facebook!
Today we cover the “Pre-Launch Checklist” to ensure maximum Shopify store profits once live.
Follow along as Rito covers everything you need to know prior to launching your first Shopify store:
In this session we’ll officially launch our store!
Up to this point, we’ve chosen our products, integrated our store with ZeroUp and created our logo – all with zero coding and minimal investment.
We’re just about ready to go live and begin driving traffic to the website.
There’s still much to cover, but for today, we are going to focus on the pre-launch checklist.
Pre-Launch Checklist For Maximum Profits
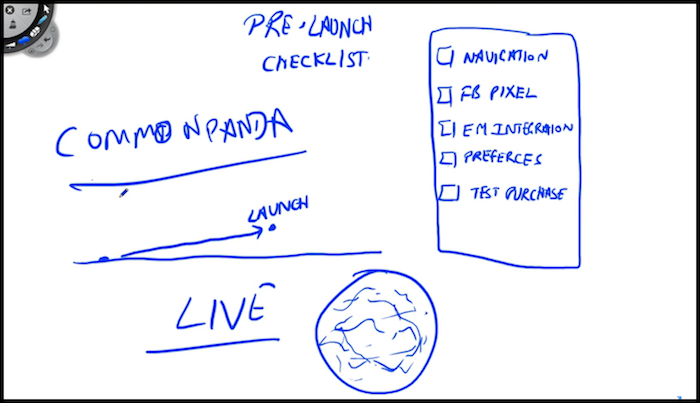
There are five specific items that need to be checked and tested prior to driving traffic to your new site.
Here they are…
Setup Your Store Navigation
User experience is everything online.
Your website navigation in regard to menus, and actual funnels must function in a manner that supports people at every turn.
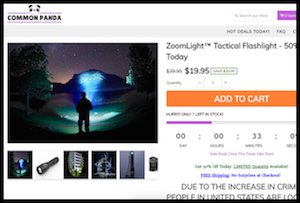
For our store, we have very simple header and footer navigation.
Our main navigation (header) contains three links; “HOT DEALS TODAY! FAQ, CONTACT”
For our footer navigation we included all of our store policies; “About Us,” Shipping Policy,” Refund Policy” Privacy Policy” and “Terms Of Service.”
We set up our footer links in a previous session, so I’ll demonstrate how to set your header menu links:
- Login to your Shopify store dashboard.
- From the lefthand sidebar, underneath ‘Sales Channels’ click “Online Store” -> Then click “Navigation”
- On the next screen click “Main menu” from the center of the page.
- We don’t need a ‘Catalog’ so click “Edit” and change the name. We changed our to “Hot Deals Today!” You can change it to anything more catchy than ‘Catalog’
- Click “Apply Changes.”
“FAQ” and “Contact” will already be present on your menu; both are fine and often times appreciated.
Install Your Facebook Pixel
A Facebook pixel is a tiny image you install on your website to allow FB ad tracking of clicks and conversions.
If you have not yet installed your pixel, do so now…
Here’s how:
Step 1. Create a Facebook pixel
- Go to your “Pixels tab in Ads Manager.
- Click “Create a Pixel.”
- Now select, “Create.”
Step 2. Add the Facebook pixel to your Shopify Account
- Return to the “Pixels” section in Ads Manager.
- Click “Set Up Pixel”.
- Select “Use an Integration or Tag Manager.”
- Choose “Shopify.”
- Select “Enter your pixel ID.”
- Copy your pixel ID.
- Go to your Shopify admin panel.
- Paste your pixel ID in the Facebook pixel section.
- Click “Save”
Step 3. Enable Facebook Checkout
- Log in to Shopify
- Click the + symbol next to Sales channels in the Shopify admin.
- Select “Learn more next to the Facebook channel.”
- Now click “Add channel.”
- Choose “Facebook from your Shopify admin.”
- Click “Get started”.
- Select “Connect account”.
Allow Shopify to connect with your business’s Facebook Page and Facebook will verify your account information. After your account’s verified, you can enable Facebook checkout using your Shopify admin.
Integrate Your Store Support Email
Normally we’d suggest using SendLane for your email marketing purposes. But today, we’re going to be using MailChimp instead because it is already integrated with our Shopify Stores theme.
Here’s how to set it up:
- From within your Shopify store dashboard, and on the left sidebar, click “Online Store” followed by “Themes.”
- On the right of the page that appears, click “Customize.”
- Click “General Settings” from the top left sidebar when the new page appears. Scroll down and select “Footer.”
- Now scroll down to Newsletters – This is where you’ll paste your MailChimp embed code.
If you don’t have a MailChimp embed code, you can get one by clicking the link just below and it will guide you through the process.
MailChimp will be very important to our Shopify store as this is how we delivery receipts, thank you’s and additional sales emails.
We’re also creating incentive to purchase products from our site with a popup promoting a 10% discount.
We want a follow up autoresponder email to automatically send when a user subscribes.
- From within MailChimp, click “Create Campaign”
- On the next page select “Create an Email”
- Click the “Automated” tab at the top center of the screen.
- Underneath “Create an Automation Email” select the “Featured” tab.
- Now choose “Welcome new subscribers.”
- Change the campaign name to anything you’d like. We set our to “Welcome Message – 10% off”
- Select the corresponding list and click “Begin.”
With e-Commerce, the emails truly don’t need to be super fancy or contain world-class copywriting.
Keep things concise and to the point. A welcome email is a good place to start.
From the right side of the following page, click “Design Email” and do something similar:
- Named our email, “Welcome”
- For the subject we named ours, “Awesome! Panda’s Got 10% OFF For You”
- Our Preview Text says “Use this coupon code to get an additional 10% off storewide.”
- “Common Panda” is who our emails are from.
- The from email address should be your store support email.
- Click “Next.”
- Now you’ll be taken to a page allowing you to choosing a template. Keep it simple.
- Upload your logo. You may need to adjust the size of your logo by clicking “Edit.’
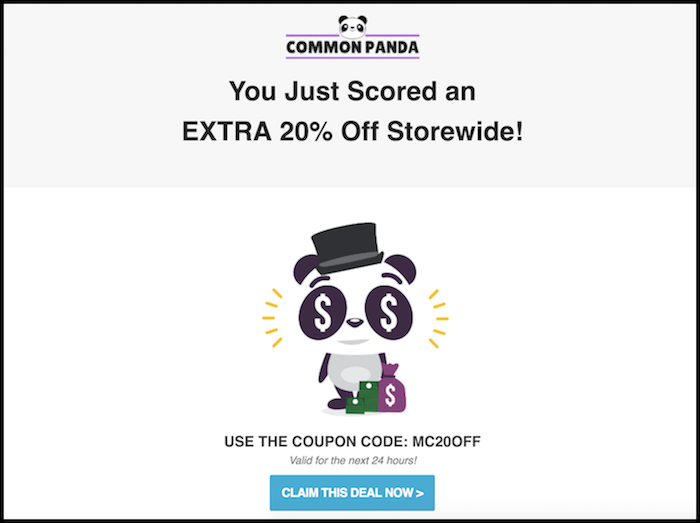
Underneath the logo on our welcome email, we used the headline “Get Extra 10% Off Storewide” and then uploaded a photo of underneath it. Use IconFinder to find something relevant to your brand.
Remember to keep things fun and simple.
Our text for this particular emails says the following – you can do something similar: “Use The Coupon Code: CP10OFF”
To create a discount, simply login to your Shopify store and from the dashboard click “Discounts” on the lefthand sidebar. Click “Create discount,” fill out the settings according to your own website and click “Save.”
Don’t forget to link any images to your website. And once you save this email you can edit the “Trigger” which tell MailChimp when to send the email – we set ours to “immediately.”
Set Your Shipping / Billing Preferences
This is crucial not only for your customer satisfaction but for your business.
You don’t want your Shopify store to go offline due to lack of payment, so make sure this is all taken care before your Shopify Trial ends.
Complete A Test Purchase
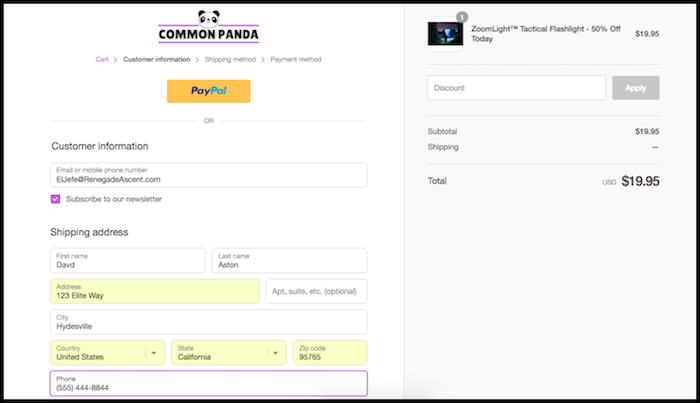
Go through the checkout process and purchase a product from your own store to ensure everything is functioning properly.
Make sure the email autoresponder arrives in your inbox, ZeroUp displays an additional 20% discount/optin opportunity, and that you ultimately receive whatever it was you test purchased.
That’s a wrap for Day 8 – Great work!
Questions, comments or just want to say hi? We love hearing from you below.
Success by choice, not by chance,
-David Aston
P.S.
If you’re not kept in the loop via our #Bizathon list be sure to sign up today.
P.P.S. Click here to begin Day 9!