Each month at FSO we build brand new businesses from Scratch in 30 days – The Bizathon Challenge!
Last month we successfully built a Membership Website from the ground up.
We setup your first sales funnel, solo ads and both targeted and retargeted Facebook Ads. You also learned advanced concepts like split testing, emerging markets and the art of story-selling.
You can even Become a founding member for just $1!
This month we’re building a profitable Shopify store from scratch.
And today, we cover “Shopify drop-shipping basics & Naming Your Store!”
Enjoy the video below as Ritoban explains exactly what Shopify is and how to profit from it:
There’s a good chance you’ve heard of, seen or interacted with Shopify indirectly.
It’s a massively popular and convenient way to leverage online commerce.
Strap up, even if you already have a Shopify store, you’ll benefit from this challenge because we’re taking Shopify to an entirely different level.
Drop-shipping can be difficult if you’re new to the game. We’re going to make it simple for you.
Concepts are only difficult to grasp when they’re not fully understood.
Here’s Shopify in a nutshell:
- No coding or designing required
- No physical products actually needed
- Drop-ships millions of products on your behalf
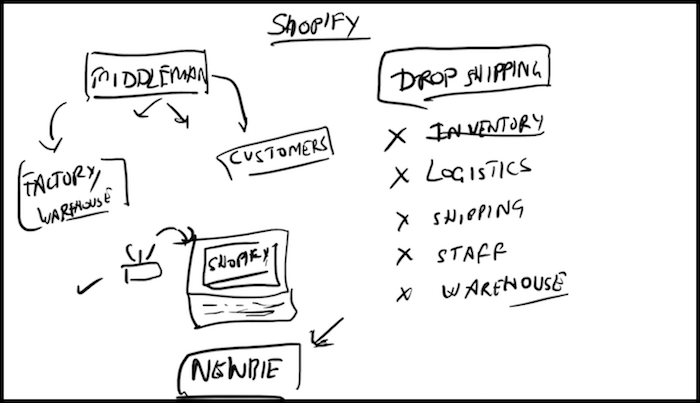
- No inventory, warehouse, staff or fulfillment worries
We’ll basically be running a physical products website, without actually having any physical products.
Shopify Basics & How To Properly Name Your Store

You’re The Middleman
With a Shopify store you’ll be drop-shipping which makes you the point of connection between the consumer and manufacturer.
There are countless companies around the world building and selling amazing products. And since you’re the one doing the marketing and gaining exposure for these products, people will be purchasing them from you.
You’ll Operate A Niche Or General Shopify Store
There are two basic types of Shopify store, the niche and the general:
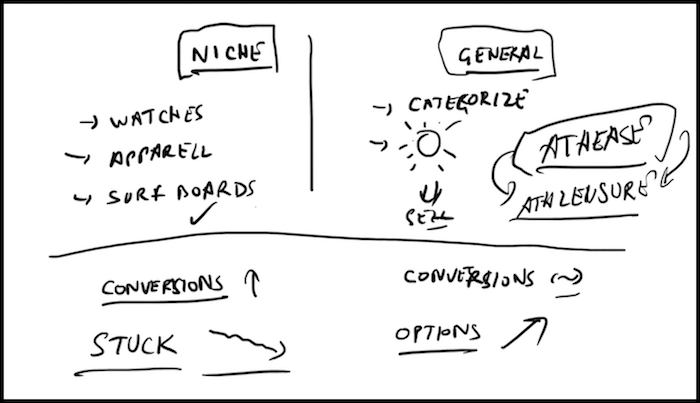
Niche Shopify Store – Targeted to one specific type of product category. Because of this hyper-targeting of one specific category, conversions will be higher.
General Shopify Store – Sells a wider spectrum of products and categorizes accordingly. Because general stores target a broader spectrum of customer, their conversions are typically lower compared to niche stores.
Many people, even those completely new to e-commerce have made a great deal of money leveraging these two types of Shopify store.
Believe it or not, a niche store, despite higher conversion rate is not the way to go in most cases. If you’re niche store flops, you’re screwed. All branding, marketing and copy has been dedicated to one specific consumer category.
With a general store, your options are unlimited.
If you sell watches and that doesn’t do well you can sell apparel. If the apparel doesn’t sell, you can try surfboards. The point is, even if these respective items do sell you can continue to add more and categorize each product accordingly.

Create A Successful Shopify Store On The First Attempt
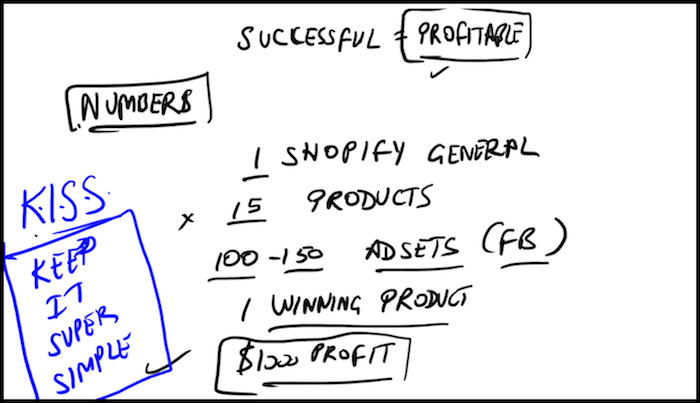
We don’t want revenue, we want profit.
You’re going to generate revenue by the end of these 30 days, regardless. But we with profit we’re able to invest back into the business and scale!
Here’s the holistic concept of creating a profitable Shopify store:
- Launch Shopify General Store
- Test First 15 Products
- Initiate & Track 100-150 Adsets
We’re not trying to make all 15 of these initial products profitable. Instead we’re just trying to identify 1 winning product. With our goal being to earn $1,000 in profit.
We’re going to accomplish this by implementing the K.I.S.S. (keep it super simple) method.

Properly Choose The Best Name
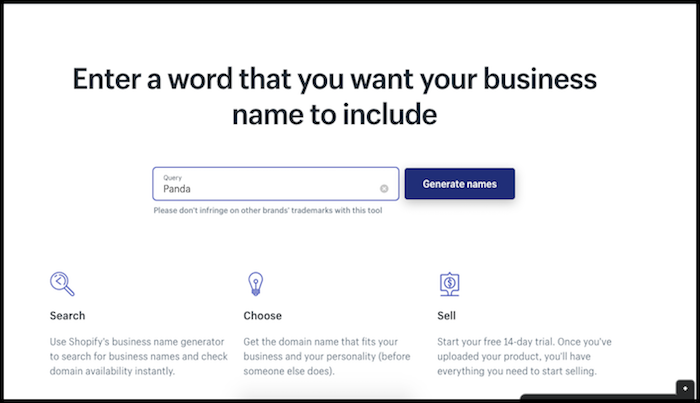
Shopify actually has a great built-in domain name generator.
Simply enter the words you want your store name to include and click “Generate.”
Click a suggested domain to ensure availability. We suggest using either NameCheap or GoDaddy as your domain registrar. They are two of the most trusted online.
It’s worth noting that Shopify will actually register domains as well, but we still recommend the aforementioned registrars instead.
Here are a couple of additional ways to pick a proper store name that sticks with people:
- Keep the name at a 4th grade level – must be speakable
- 3-4 Syllables if you can help it.
- Make sure it’s memorable
- 1-2 words is usually ideal

When choosing your domain name, also choose a .com – don’t get fancy. People automatically associate websites with .com before anything else. While your first couple domain names may be taken, trust me when I say there are plenty to choose from.
A couple other ways to generate a create business domain name is to use the following:
- Different types of animals
- Trigger words (hype, instant, legend)
- Adjectives (happy, good, nature, color, etc)
- Common Words or Phrases (hella, phat, kicks etc)
If you find yourself striking out on a good name or if you’re just struggling a creative block, head to LeanDomainSearch and enter your primary keyword or phrase where prompted.
Now look halfway down the page on the right hand side, click “View Full List.” It will show you the 10,000 most popular topics online surrounding your keyword via domain count. This should definitely offer inspiration.
Get creative and combine words to find the perfect, catchy domain name.
Note: Don’t use words like “Deal” or “Store” when choosing a name.
Once your domain name is registered, immediately create a gmail account with the same name.
Connect Your Domain To Shopify
The last main step today, is linking your new domain to Shopify.
From within Shopify, click “Domains” which will immediately forward you to another page where you’ll select “Connect Existing Domain.”
Now enter your domain name – in our case it’s CommonPanda.com
Once your domain is located, a button that reads “View Instructions” will appear – click it.
Now following the instructions accordingly.
Shopify makes life simple. Just follow the remaining steps provided by Shopify. They’ll be unique to each user.
Finally, we’ll setup email forwarding (with our registrar NameCheap).
- From within NameCheap, click the “Domain” tab at the top of the page.
- Scroll to “Redirect Email” click it.
- Now select “Add Forwarder”
Input any alias you’d like. In our case, we used “support@commonpanda.com.” Now forward to the new gmail address you just created.
Send a test email to your alias email to ensure proper forwarding.
Done!
People appreciate the convenience of online shopping.
When consumers decide to purchase a product or service, they start by looking online.
Your website is where people can research products and determine if they’re a good fit or not. A well-crafted eCommerce site can influence purchases by making it easy to take action.
Stay tuned, tomorrow we cover our logo and backend settings.
That’s it for Day 1 – Great work!
Questions, comments or just want to say hi? Please do so in the comments below.
Success by choice, not by chance,
-David Aston
P.S.
If you’re not kept in the loop via our #Bizathon list be sure to sign up today.
P.P.S. Click here for Day 2!


thank your for these instructions man… have been following ur vlogs and blog…
Awesome Pratik.