Each month at FSO we build a new business from Scratch in 30 days – The Bizathon Challenge!
If you haven’t yet started with Shopify, you’ll want to do so right now by clicking here.
Because this month we’re building a profitable Shopify store from the ground up.
Yesterday we revealed how Facebook Ads Identify Winning Shopify Store Products
Today we cover steps to take after your “First Shopify Sales” come in.
Follow along as Rito covers steps to take after your first Shopify store sales begin rolling in:
4 Important Steps to Take After Your First Shopify Sales
Within our first 24 hours of being live, we are already seeing sales!
If you want to build a profitable online business and earn a passive income, Shopify is definitely the way to do it.
It’s one of the easiest business models to follow and doesn’t require any coding knowledge to implement. Consistently take action as we progress through each #bizathon and you’ll be well on your way to financial freedom.
Once your first sales begin to come in, you’ll need to begin actually fulfilling the orders via AliExpress drop-shipping, or in our case ZeroUp which will handle the process for us. You’ll also need to start trimming up your ad sets – scaling what’s converting, and pausing what’s not.
Integrate MailChimp With Your Shopify Store Sales
We’ve got to be able to stay in touch with our customers, not only for ongoing service, but for continued sales.
Once logged into both your Shopify store and your MailChimp account, do the following:
- From within MailChimp, hover over your profile ID and select “connected sites”
- Click “Get started” followed by “Shopify”
- The next page will ask for your Shopify store URL – Paste it accordingly and click “Next”
- On the next screen, click “Install app”
- Now choose the list you want customers to be added to upon purchase then click “Next”
- You see something that says “Your Store Is Connected” – click “All done.”
- Ensure this message is set to go out “As Soon As Subscribers Join Your List”
Now that MailChimp and Shopify are connected your customers will automatically be added to a customer email list.
Aside from updates and order information, you can now automatically send emails to customers who abandon a cart, or looked at a certain product.
Create A Welcome Email That Contains A Discount
People who have already bought from you are likely to purchase again with a little bit of incentive – in our case a 20% discount.
Not only are you welcoming new customers into the family, you’re showing your thanks by offering an awesome discount. This will make people feel special, and like they owe you, both of which help your odds of a repeat customer.
Here’s how to create a welcome email with a Shopify discount from within MailChimp:
- Start by creating your Shopify discount code if you haven’t already -> Shopify Dashboard -> Discounts -> Enter your code -> Save
- Now head over to MailChimp and open your customer list and Click “Next” and select “Design email.”
- Now fill out the details according to your own brand and click “Next.”
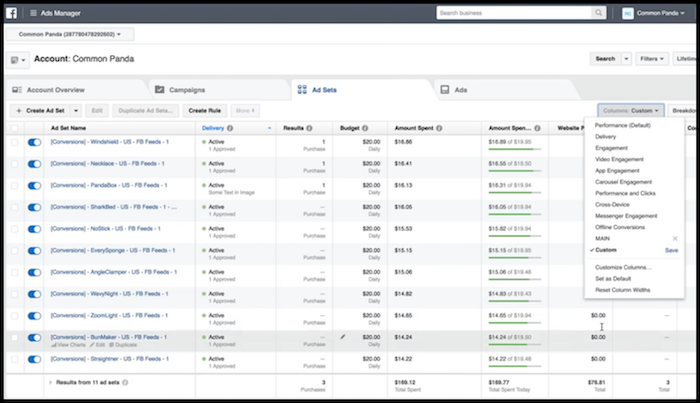
Pause Ad Sets That Aren’t Performing

At this point, we’ve already been running Facebook ads for our initial Shopify store products for at least 24 hours. Whatever hasn’t gotten many impressions or clicks up to this point, likely won’t.
In order to maximize our conversions, while conserving our budget, it’s important to pause any under performing ads.
Don’t get emotionally attached, as running a successful business is a numbers game.
Any ad sets that have already seen sales, we are going to leave running for now.
For all the other ads that haven’t sold anything yet, we are going to look at the cost per click. Anything that is several dollars per click, will be immediately paused.
As for the remaining ads that haven’t converted yet, they still have a low cost per click. So we are going to allow FB to continue collecting data and let these ads run a bit longer to see if they don’t begin to convert.
Begin Fulfilling Orders (With ZeroUp)
If you’re not yet familiar with ZeroUp, I suggest you get acquainted with this post.
Now, for those who have already purchased and installed ZeroUp, we like to fulfill orders using their Chrome Extension which comes with the software.
Here’s how to fulfill Shopify Store orders with ZeroUp:
- From within ZeroUp and next to any order, click “Buy Via Extension.”
- You may be prompted to login to AliExpress if you have not already.
- Once logged in to AliExpress, ZeroUp literally places the product order.
- ZeroTake the Customer info from Shopify, added the product to the cart and prepared all checkout information – all that remains is for you to click “Confirm & Pay”
Boom! You literally just drop-shipped your first order.
Take advantage of the technology that’s available to you in order to make like easier and your business as profitable as possible.
That’s a wrap for Day 10 – Great work!
Questions, comments or just want to say hi? We love hearing from you below.
Success by choice, not by chance,
-David Aston
P.S.
If you’re not kept in the loop via our #Bizathon list be sure to sign up today.
P.P.S. Click here for Day 11!

