WordPress is a god-send for us because it’s a solid platform for rapid website development. It doesn’t take much time to get used to – but once you’re used to it, you can launch websites within minutes.
In today’s 15-Minute Sprint, that’s exactly what we did: WordPress Quick Start.
Backdrop Pages
There are a few essential elements that you need to make sure you’ve gotten down BEFORE you start building your Email Business.
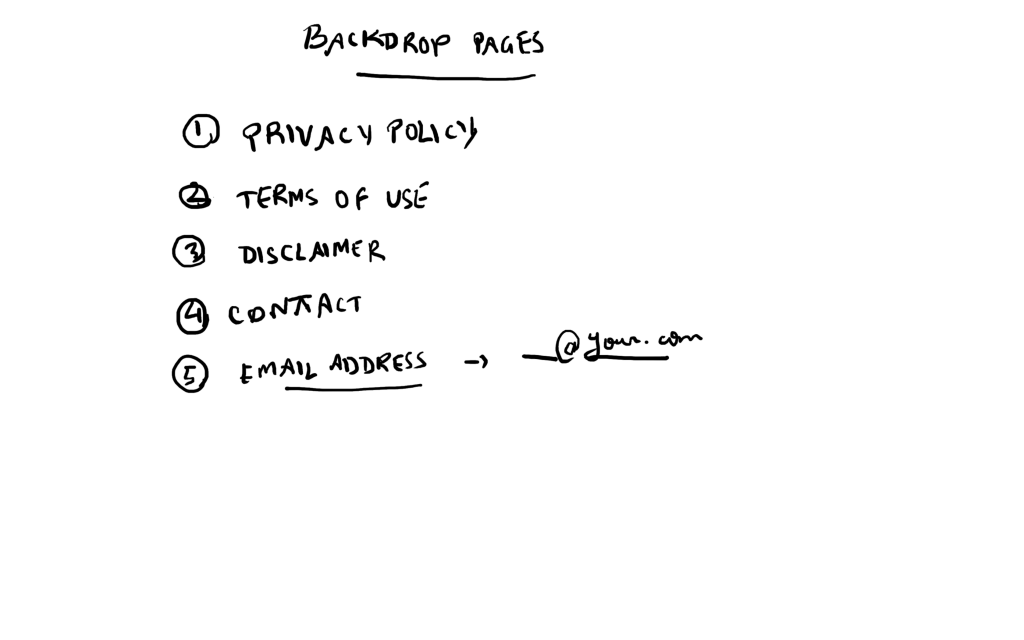
These pages are:
#1. Privacy Policy
Once you’ve installed the ‘Auto Terms of Service an Privacy Policy’ plugin in WordPress – enter your default settings in there – like company name/your name, contact email address, location of business etc.
It just takes a couple of minutes to fill in that information.
Then copy the short-code for Privacy Policy page that the plugin gives you and paste it inside a ‘NEW PAGE’ in WordPress.
Publish that page and you’re done.
#2. Terms of Use
The plugin mentioned above also give you a Terms of Use shortcode. Create another new page and paste that shortcode in the page.
Make sure you’re naming the Pages appropriately.
#3. Disclaimer
I used the one we had created for my company, MarkAce Marketing. There are however several other disclaimer templates and generators online. Just do a Google search for: Affiliate Disclaimer Template or Disclaimer Generator
#4. Contact Us
Install the ‘Contact Form 7’ plugin and edit the default contact form that comes pre-installed. All you need to do is change the admin@yourdomain.com to whatever your actual ‘contact email address’ is.
Create a new page, enter the title, and a little line that basically says that people are welcome to email you at your ‘contact email address’ (I’ve covered that below) and add the shortcode for the ‘Contact Form 7’ plugin.
Contact Email Address
You need to set up an email address, which will be something like: hello@yourdomain.com. Here are some ideas for more email addresses, choose any one you wish:
- contact@yourdomain.com
- support@yourdomain.com
- admin@yourdomain.com
- reach@yourdomain.com
- do-not-reply@yourdomain.com
I was able to create this new email address easily inside my Siteground cPanel account. After creating that new email address, I set it up for forward all incoming email to an active email address that me and my team check regularly.
Theme Setup
Since we will be using other tools like ClickFunnels and Inbox Blueprint to set up our actual Landing/Opt-in Pages – choosing a theme is not critical.
What I do recommend however, is changing the default WP theme (which is Twenty Seventeen right now) to something more cleaner.
We chose the Twenty Fifteen theme – super simple to customize and does the job we want.
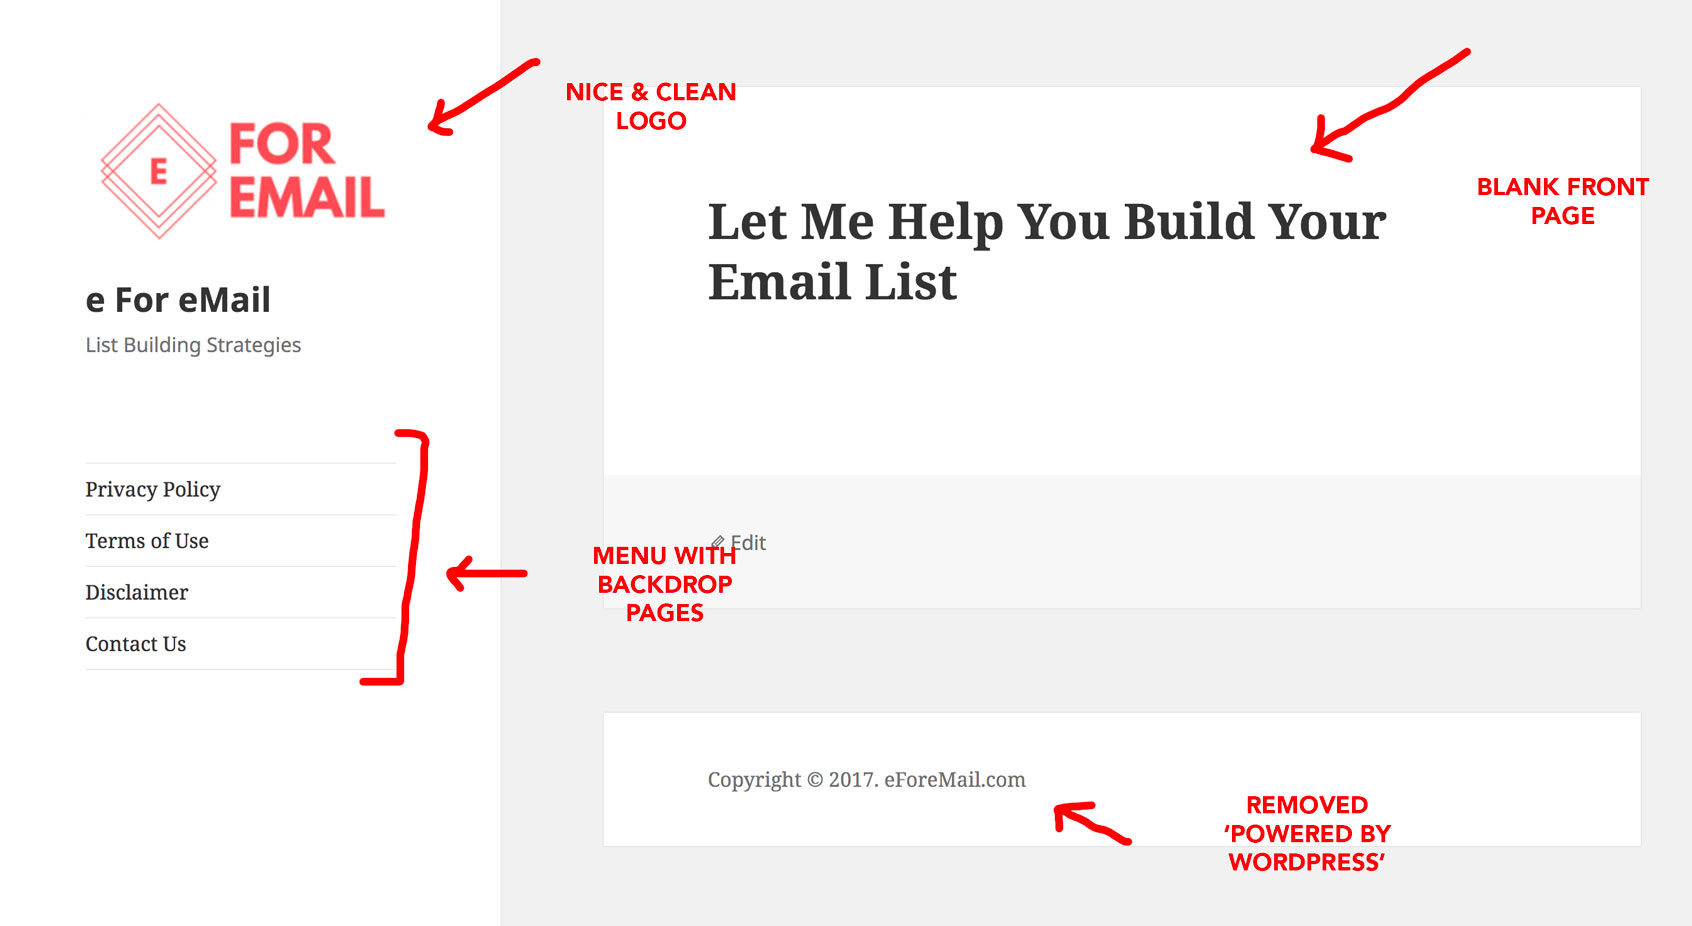
Blank Front Page
Before you add a blank front page, make sure all filler content – like posts, pages, and comments that come pre-published when you install WordPress for the first time. The most common one is the ‘Hello World’ post.
Simply trash those items.
Next up, create a new Page and enter a short headline – something your site will be about. It doesn’t need to be fancy – don’t overthink it. We will be placing an opt-in box below the headline soon.
Next, head over to: Settings -> Reading and set up that newly created page as the front page. Hit Save!
Menu Setup
Simply create a new menu – call it ‘main menu’ and then add all the Backdrop pages that you just created to that menu.
All said and done, our website looks something like this:

2-Minute Logo Design
The quickest and easiest way to design a logo is to head over to Canva.com – it’s a FREE service and all you need to do is login with your Facebook/Google account and start designing your logo.
It’s much more intuitive than Photoshop and much more simpler as well. Drag-n-drop!
They have several logo and banner templates – choose any one of them. Add/remove elements as you please. Change the texts and colors.
Once you’ve used Canva a couple of times, you will be designing awesome looking logos in minutes.
Here’s the logo I was able to design in less than 2 minutes:
Bonus Tip: Remove “Powered by WordPress”
We don’t want any other link on the website apart from the links we want our users to see. So remove the default “Powered by WordPress” blurb that shows up in the footer of your website.
Some themes may have the theme author link. Some may not.
The easiest way to remove that is to go inside: Appearance -> Editor and then clicking on the ‘footer.php’ page.
Simply select the entire link and text that shows up on your footer, and delete that. Make sure you don’t delete any ‘div’ or ‘span’ etc. from the HTML code.
I know it’s a bit techy – but it’s not that difficult if you’ve done it a couple of times.
Thank you for reading! I know today was a really quick-quick sprint – some people found it difficult to follow along. If you did too, then load up the recording of the video (included above) and then play it at a slower speed. Hope that helps.
I would love to hear your thoughts on the Quick Start for WordPress – let me know in the comments below.